The ArcPad Team Blog

Unofficial stuff from the team behind the World's leading mobile GIS platform

Friday, May 29, 2009

ArcPad 8 Training in San Diego on Sunday, July 12th!


Well, the bad news is there's no ArcPad pre-conference session at the ESRI User Conference this year.


But... the good news is that GeoMobile Innovations, with support from members of the ArcPad Team, is hosting a 1-day hands-on ArcPad 8 Bootcamp at the Sheraton San Diego Hotel and Marina in San Diego on Sunday, July 12th at a special price.


Details

This workshop teaches you critical ArcPad field GIS data collection and mapping skills regardless of which PDA/GPS system you currently use or plan to use. You will learn the following and more:
  • ArcPad 8 fundamentals including core concepts, tools, and functions of ArcPad.
  • Configure your base tools and toolbars and arrange them for maximum productivity.
  • Start your project quickly, including tapping into readily available background data.
  • Configure ArcPad to work with YOUR GPS device.
  • Collect GPS data in our hands-on data capture field sessions.
  • Link photos to your GIS features in the field.
  • Learn the basics of data check out and check in workflows using the ArcPad 8 Data Manager extension.
  • Step into customization. Create project specific tools and toolbars, data entry and query forms, and task lists using ArcPad Studio 8.

For more information, and to sign up, please visit http://www.geomobileinnovations.com/training/arcpad-bootcamp-sandiego

Thursday, May 28, 2009

Guy Burkitt Joins ArcPad Team


Guy has joined the team as a developer. A versatile software engineer, Guy has applied his creative and inquiring talents over many cerebral career choices to date. Guy brings a commitment to new ideas and is warmly welcomed to the team.

Wednesday, May 20, 2009

ArcPad Navigator Toolbar

The Navigator Toolbar was introduced in the latest release of ArcPad. It allows the user quick ‘map navigation’ without losing the current tool in use.


imageFor example I am using the ‘identify’ tool but don’t want to have to click on the pan/zoom tool button to select the pan tool.


imageBy clicking the blue pan tool button on the Navigator toolbar, the identify tool is remembered the active Navigator tool button is activated (coloured) and I make my quick pan.


imageAfter the pan operation is finished the ‘identify’ tool is returned as the active tool button.


For more information on the Map Navigator go to the ESRI ArcPad online help at http://webhelp.esri.com/arcpad/8.0/userguide/getting_started/arcpad_basics/concept_navigator.htm

Tuesday, May 19, 2009

Simulate GPS for indoor training and demos

Some of you may already know about FakeGPS - it's been around for years.
FakeGPS is an extension for ArcPad that simulates a GPS feed. It reads longitude and latitude points (and optionally height values) from a text file and sends the points, one at a time, at a given interval, to ArcPad.
The points will appear to ArcPad as if they are coming from a GPS.

FakeGPS is available at:
http://arcscripts.esri.com/details.asp?dbid=13817 (or search for FakeGPS on arcscripts.esri.com).

You'll see instructions on how to use this extension, but the quick version is:
- Extract the zip file you download from ArcScripts.
- Place the appropriate DLL in the ArcPad Extensions folder:
FakeGPS7n.dll – Windows XP/Vista
FakeGPS7a.dll – Windows Mobile
- When you start ArcPad, go the GPS Properties dialog, and you’ll see the FakeGPS protocol as an option. Select this protocol.


To really make FakeGPS useful, you need a way to easily generate log files to use as inputs. I wrote a tool to help generate these log files and published it as an applet on ArcScripts at:
http://arcscripts.esri.com/details.asp?dbid=16299

This FakeGPSLogTool applet allows you to select any line or polygon feature in a map and use its vertices to generate a FakeGPS log file.
You can then use the log file with the FakeGPS extension to simulate a GPS feed for indoor training or demos.


Monday, May 18, 2009

A Field Users guide

For guidance on how to use ArcPad in your field GIS project, take a look at Johnathan Raper’s ebook, ArcPad A Field User’s Guide

This book includes discussion on the value of Mobile GIS, hardware options and an overview of ArcPad and its capabilities. However, most importantly, the book includes some great examples of how ArcPad has been used in real projects.

Monday, May 11, 2009

Latest versions of Software / Firmware related to ArcPad as of: MAY 2009


There has been no major related software changes in response to the recent release of ArcPad 8.

Software that has received particular interest on the forum is GPS Correct and GPS Analyst. At this stage, Trimble confirm that there is not going to be a specific update to these products directly related to ArcPad 8. Existing users should continue to use 2.42 and 2.1 respectively. GPS Correct 3.0 has recently been released but does not have changes specifically related to ArcPad. Please read the GPS Correct release notes to determine if this version is suitable for you.

Also note that the Nomad Firmware update is appropriate for all Nomads (TDS or Trimble) except for the Nomad 800X, 800XC or 800XE.

Organisation Software / Firmware
Current Version No
ESRI ArcPad 8.0
Microsoft Active Sync (XP) 4.5
Microsoft Device Centre (Vista) 6.1
TDS Nomad Firmware 1.0.4
Trimble GeoExplorer 2008 Series GPS Firmware 2.03
Trimble GeoExplorer 2005 Series GPS Firmware 1.82
Trimble
GeoExplorer 2005 Series OS Firmware 5.1.16
Trimble GPS Correct 2.42 and 3.0
Trimble GPS Analyst 2.1

Friday, May 08, 2009

Authoring, Publishing and Synchronising with ArcPad 8

With the introduction of ArcPad 8, comes the ability to author, publish and remotely synchronise with the map service on your mobile devices.To give you a quick quide on how to accomplish these tasks, we've provided a series of short instructional videos to guide you through the process.
As with all activities associated with ArcPad - full instruction on how to achieve these tasks is available via the ArcPad User and Reference guides.

The Author Project for ArcGIS Server tool in ArcMap guides the user through a wizard with similar dialogs as in the Get Data for ArcPad wizard. The Author Project for ArcGIS Server tool is enabled when you have a saved ArcMap .MXD open. To create data, you need to Publish Data to ArcGIS Server.

Select the Author Project for ArcGIS Server from the ArcPad Data Manager Toolbar and the welcome page appears. By clicking 'Next', the Select Data screen appears. All of the layers in the .MXD, including the Relationship classes associated with geodatabases are displayed together with the layer name.
On the action tab you have an option of setting the action on an individual layer or you can choose to set the same settings for all the layers.
Note: Only the layers that have the map’s spatial reference will be available for checkout.

Follow the logical sequence of instruction in the wizard to Author your map publication. At the end of the process, an .apo file is created alongside your ArcMap .mxd document. You use the mxd and apo together to create an ArcPad publication when publishing the ArcPad project to ArcGIS Server.
At this stage, no data has been created on the server. You must complete the Publish Data to ArcGIS Server process to create a Map Service.


Publishing Data to ArcGIS Server
An ArcPad Project is published in a similar manner to any other ArcGIS Server Map Service in ArcCatalog. If you have not already, you must first copy the .mxd together with the associated .apo files to place that is accessable by the ArcGIS Server. It is recommended that you create the folder c:\MXD to store your mxd's. The “Add New Service” option on the right click context menu of the ArcGIS Server (in ArcCatalog) provides you with the option to create an ArcPad enabled Map Service.

Follow the steps of publication as you would for any other Map Service. On the add GIS Service page of the wizard, select “ArcPad’. If your ArcGIS Server environment uses a reverse proxy server, you should add the server's url on the GIS Service page of the wizard.

When you ‘Finish’ the wizard, an ArcPad enabled Map Service is created, which you can immediately preview in ArcCatalog or ArcMap as you would any other Map Service. Also created on the server are the ArcPad files for deployment.

After an ArcPad project is published to the ArcGIS Server successfully, a zip file and a .cab file are also created on the Server. If you wish to disseminate your data to a large group of field users, you can download the cab via your desktop web browser and email or distribute as required. The zip and cab files are stored on the ArcGIS Server in the folder :\\ [Your GIS server name]\arcgisserver\arcpadpublications\DataForArcPad
Review the video for further instruction on Publishing ArcGIS Map Services.


Synchronising Data from ArcGIS Server

To download published data to your mobile device, open the ‘Add Data from Server’ dialog in ArcPad.
Long time ArcPad users should recognize this dialog, in previous versions of ArcPad it was called the ‘Add Internet Server’ dialog and was used to add IMS data to your map.


The dialog still allows you to add an IMS Service, but it also allows you to browse for ArcGIS Server ArcPad Services. Enter the URL of your ArcGIS Server (which contains published ArcPad data), and choose the data from the list. That data will be downloaded to your mobile device, unpacked and added to your map.


Edit your data in the same way you would any other data. To synchronize your edits with the enterprise geodatabase, simply create a connection to your network (via WIFI, phone, or USB connection to your pc and network) and choose the ‘Synchronize Data with ArcGIS Server’ menu item in ArcPad.


The ArcPad sync window displays messages that describe the synchronization process.
The Video here will further illustrate and demonstrate the process.


Thursday, May 07, 2009

ArcPad Trekkies


In recognition (arguably) of Star Trek's significant influence in mobile communication & data collection, generally and ArcPad, in in particular and to co-incide with the worldwide release of the new Star Trek movie, Maptel's trekkies 'beamed' into office in the Star Trek finery.

In the fictional(?) Star Trek universe, a communicator was an unreliable mobile phone device that allowed the show to run its full 60 minutes with advertisements. Marika is holding a rare example of the communicator which still works as well as it didn't in the show.

A tricorder is a handheld device (probably with an early version of ArcPad 1 or ArcPad 2) used for scanning an area, interpreting and displaying data from scans to the user, and recording information. Models were also used for engineering and medical applications.

Stephen passes on his Vulcan wish to all
"Dif-tor heh smusma"

Some tips for migrating your Applets to ArcPad 8

In general, your applets written for ArcPad 7.1 will work without modification in ArcPad 8.0. However, there are some issues to be aware of to make this migration as clean and easy as possible for you and your users.

1. Toolbar images

Toolbar images have been supported since ArcPad 6, but are not commonly used in Applet toolbars.

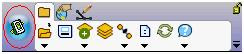
ArcPad 8's tabbed toolbars make it much more important to provide toolbar images to help users quickly identify and switch to your Applet’s toolbars. If you don’t configure a toolbar image, ArcPad 8 will display a generic image.

Notice the difference in the user experience when using toolbar images vs. not using them in ArcPad 8:


2. "Built-in" toolbars and tools

Prior to ArcPad 8, there were three built-in toolbars (Main, Browse, and Draw) with corresponding built-in tools.

If you wanted to add, remove, or re-arrange tools on these toolbars, you had to do the following:

· Hide the built-in toolbar(s)
· Create custom toolbar(s) containing the desired built-in tools and menus
· Add the custom toolbar(s) to your Applet or default configuration file (ArcPad.apx)

This required quite a bit of work - especially if all you wanted to do, for example, was remove one tool from the Browse toolbar.

With ArcPad 8, all toolbars are customizable! Out of the box, you will still the see Main, Browse, and Draw toolbars with their corresponding tools; however, these are no longer fixed.

You can use the ArcPad Toolbar Manager to re-define, re-arrange, or remove the default toolbars loaded when ArcPad 8 starts. The default toolbars are stored in ArcPad.apx in your My ArcPad folder (below the My Documents folder).


Click Edit and then simply drag and drop tools onto or off of the desired toolbars.


3. The Quick Action tool

ArcPad 8 introduces the Quick Action tool.

It provides quick access to commonly used tools. Out of the box, it exposes a dropdown list of common tools and menus.This may or may not be appropriate for your Applet. Not to worry - like the "default" toolbars, the Quick Action tool can be easily re-defined or removed.

To re-define the Quick Action tool:

Use the ArcPad Toolbar Manager to drag and drop tools onto or off of the QuickAction tool.

To remove the Quick Action tool:

There is a property to hide the Quick Action tool in the ArcPadPrefs.apx file.

In general, the easiest way to configure properties for ArcPad to use with your Applet is to set the desired properties in "vanilla" ArcPad, and then deploy the ArcPadPrefs.apx file that gets created/updated.

For the Quick Action tool, tap the small arrow in the lower right corner of the toolbars, and uncheck QuickAction.


Or, if you're an XML junkie, go right to the ArcPadPrefs.apx file in a text/xml editor and set the applicationbutton attribute to be "false" in the TABBAR element:

...
<DISPLAY>
<MAPNAVIGATOR/>
<TABBAR applicationbutton="false" dock="top"/>
<SYSTEMTRAY/>
</DISPLAY>
...

4. The Open Map dialog

ArcPad displays a friendly Open Map dialog on start up to help guide the user and get him or her started. Like the Quick Action tool, this may not be appropriate for your users.

There is a setting to suppress this dialog in the ArcPad Options dialog, General page; however, that approach cannot be used for mass deployment. This setting is not stored in ArcPadPrefs.apx, but is one of the few settings stored in ArcPad.ini on desktop and the registry on Windows Mobile.

· The desktop ArcPad.ini file is stored in C:\Windows.

The setting to suppress the dialog is:
[Startup]
ShowStartupDialog=0

And to show the dialog:
[Startup]
ShowStartupDialog=1

· On Windows Mobile, the registry key is:

HKEY_CURRENT_USER\Software\ESRI\ArcPad\Startup

The DWORD value is: ShowStartupDialog
0 = No
1 = Yes

5. Default loading of ArcPad modules

In ArcPad 7.1, all extensions (including built-in modules like TSIP and JPEG) are loaded automatically when ArcPad starts.

ArcPad 8, however, only loads the most commonly used extensions on start up by default. This is done in order to conserve available device memory for working with your data faster.

If ArcPad with your Applet depends on additional or fewer extensions, you can modify the extensions that are loaded automatically (or even load none at all).

The settings are stored in ExtensionPrefs.apx in your My ArcPad folder (below the My Documents folder).

The easiest way to configure this file is via the Advanced Settings dialog, Extensions page in ArcPad.


Again, if you're an XML junkie, feel free to edit this XML file directly.

6. Bugs found
We always strive to be bug free, but occasionally bugs make their way into a release. We've identified the following issues as new bugs in ArcPad 8.0. Please be aware of these and update your code as necessary.

CQ00311090: Setting Map.Scale property crashes ArcPad 8 (but not 7) on mobile device

CQ00311091: New in AP 8: Map.Layers(x) returns an invalid Layer object when x not present